The object of measurement is to get intelligence to understand if we are meeting our objective, and if not, why not? Then, we have the data to try to resolve the problem. A single component can be made up of hundreds of individual definitions, each with its own specification. Each definition will require assessment to confirm it meets specification.
Technical Product Specification (TPS) is the term that describes all of the design, definition and specifications that are required to manufacture, and then verify a product.
Within TPS we describe Geometrical Product Specification (GPS), which is focused on the dimensional aspects of the product whereby ‘Definition’ being the perfect feature (the nominal) with ‘Specification’ being the permissible and tolerated variance (tolerance).
In industrial dimensional measurement, it is our end goal to measure and appreciate size, form, location and orientation of various features against nominal and tolerance values, including the potential use of Geometrical Dimensioning and Tolerancing (GD&T).
We measure features of the sub-components, the assembly condition, sometimes even to assist the assembly process. We measure the measuring equipment and any traceable artefacts to establish conformance and capabilities. We determine and measure the dimensional and non-dimensional process inputs such as temperature, vibration and flow, to try and control the process variation. These are all common goals across industrial metrology.
Metrology is a tool, and like all tools, it needs to be appropriate to the situation and the outcome you wish to achieve. A simple screwdriver can turn a screw, a cordless screwdriver can do it faster and sustain that endeavour over many multiples, but it costs more to buy, use and maintain, it has higher skills needs of its operators.
A sledgehammer can crack a walnut, but so too can a small hammer. What I am trying to drive at, is that metrology must be fit for purpose to do its job, but it must also be appropriate to the resources and business needs that will create constraints.
What does Metrology give us? Metrology is often simply described as the science of measurement, a nice headline but an over-simplification. Measurement is the prime core of metrology.
We measure to collect data to inform about the measurand (the thing to be measured) across many of the S.I. Units and their derivatives. Mostly, we measure against specifications, target values with a range of acceptable error that can be tolerated and not impact planned function. My world is in dimensional measurement, the Metre and all its associated lengths such as the mm and in some cases still the inch. Industrial dimensional can also include surface texture at the Micrometre scale (0.001mm)
But in reality, measurement is only the last step. The measured result is something we use to make decisions. Pass/Fail or correct drift and determine many other production process fluctuations. But what if it’s wrong, or a bit wrong or unstable. If you measured again, would you get a different result? How different, how wrong and will it cause the business an issue in any decision making?
Now, we are getting to true metrology. Metrology is not about getting an individual result, but knowing enough about the whole measurement process to understand how much your result could be wrong, if repeated. By quantifying the variation in the actual measurement process and managing/mitigating them appropriately, you can provide confidence in the fitness for purpose of your equipment, process and the subsequent results. Better results, better decisions.
Old lessons are still lessons
I read a lot of military history and was recently reading a book on a major first world war battle, Loos (1915) for those interested. It covers the to and fro of battle, but also the leadership and strategies that decided its outcome. I often find lessons that are still valid in leadership today.
This book struck two chords ‘gross over-simplification’ and ‘bite and hold’. So, indulge me as I weave them into my modern daily working world. To assume every measurement is exact and 100% repeatable is to ignore reality and the laws of physics. To just take measurements by ap plying metrology practices is gambling on every result being good enough, which it isn’t in a world where over-simplification in the wrong areas can cost you competitive edge.
What I am trying to get across, is that your own often unique combinations of variations in your results need applied metrology to define and gain confidence in how good your results actually are. By undervaluing the effort needed to be put into the understanding of the measurement process, some are caught by that gross oversimplification trap that will undermine productivity and quality.

Bite and Hold
To manage metrology and its subsequent measurement is a continuous iteration of planning, inputs, actions and outputs. I drew up something to try and at least show the pattern of measurement and its supportive activities, but this is only the tip of the iceberg.
Building on your current metrology to develop it to a high performing productive element of your business can look intimidating, but it has natural layers that you can easily and gradually build upon. Trying to implement metrology fully.
As embraced within Lean and TQM in one leap may leave you confused and create frustration and friction in your workforce. As I often say, ‘Metrology is like peeling an onion’ the more you peel, the more you cry. Metrology is not the only V.I.P. of manufacturing, it should recognise that it has many peers and one master and must work closely with design, production, assembly and business management. However, it should always be considered by those others to be the most valuable of business counsel, never taken for granted, overlooked or under resourced or its advice will be the poorer for it.
Productivity is a cornerstone of profitability and the health of a business. Productivity losses are caused by many things, some process, some product. Metrology when applied and managed effectively is often one of your earliest warning systems, but can also be one of your biggest instigators of waste when not practiced proficiently. Too often, pure metrology evangelists plant a flag at the top of ‘mount perfection’ and shout down to everyone, to come join them by doing things the perfect way.
I always say to my students and training candidates, that metrology is not about perfection, there is no such thing. In any cost vs benefit struggle, good enough is enough and continuous improvement will get you that competitive edge. The application of metrology must be balanced against your business constraints, know when to stop peeling that onion I mentioned by evaluating cost vs benefit. Metrology improvements can deliver huge benefits but as metrology sits across a broad spread of the modern workforce it is easy to forget a lot of people need to be on the journey. People are averse to change.
If you push big and have a long timescale for change, you will invariably lose people on the journey. In the first world war, over ambitious plans combined with poor communication meant initial gains were healthy, counter-attacks and setbacks occurred, and the ge

nerals often found themselves back where they started, having wasted valuable resources and in their case the flower of their youth. After many ‘wasteful battles’ strategy was developed to ‘bite and hold’. Our modern manufacturing world translates to making realistic step changes, and making sure you sustain them.
My advice to all those interested in advancing their metrology and connecting it to productivity, is to be aware of the issues around change management, be prepared to bite and hold. Metrology advancements and using metrology to unlock productivity is not just for Christmas, it needs to be treated as a campaign.
Do not underestimate and oversimplify the journey, but at some point, you will have to pick this fight, as Industry 4 is calling you forward to the jump-off point, you had best be ready. Pick your battles tactically, fight them on your terms, sustain gains, show leadership and have a strategic purpose. In the words of the ditty from the film with the same name ‘Oh, what a lovely war.’
Accuacy vs Precision the difference
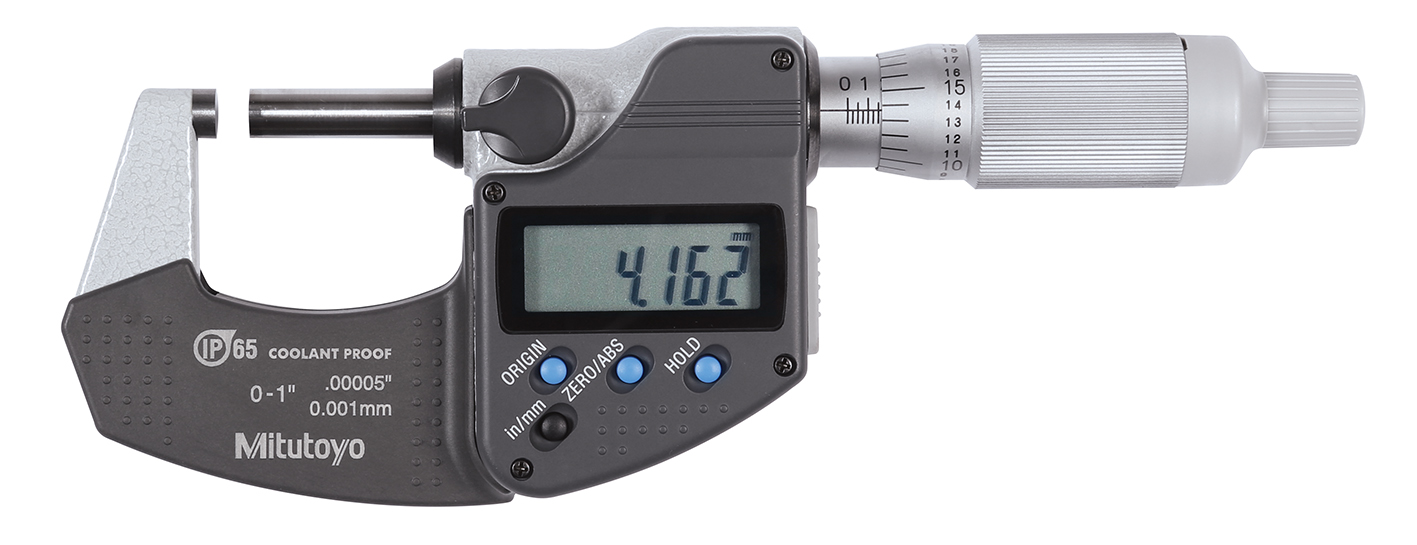
Let’s expand on the above with a simpl example. The measurement is seen as the desired object, but the measurement should ideally be in two parts, as it is important to know both. After gaining a result, the other element is knowing by how much your result could be wrong. In other words, understanding the accuracy of your process and the effect of variation that would be shown if you repeated the measurement several times (Precision). Accuracy and Precision have two distinctly different meanings in metrology. Accuracy is how far you are away from the true value, precision is your ability to repeat the answer.If I gave a 10mm gauge block to a group of ten people and asked each of them to measure the block with a 1 micron resolution digital micrometer,I might expect that their results would typically vary by 3 to 5 micrometres (0.003mm – 0,005mm), that is the range from the smallest to the biggest result. Try it?
With good measurement practices and calibrated equipment, including the gauge block, you should expect your results to be scattered around the 10.000mm mark. If something else is in play beyond normal measurement process variation (precision), you might find that your results are not roughly spread around the 10.000mm mark. If that is the case, you are seeing bias which causes inaccuracy. This could be a multitude of potential issues, singular or several working in conjunction to create this bias. Back to our micrometer, what if it was reading incorrectly? Imagine the micrometer reads 11mm when its actually at 10mm and this is not known by the users. If you asked the ten people to measure an unknown sized block with this inaccurate micrometer, their results would still be spread around the 3 to 5 micron variation and what we call precision, but the average result would be near to 11mm and not the 10mm it should be. And so, repeatability would be single


